Send invoices to QuickBooks Online
Video: Sending Invoices and Payments from CCH iFirm to QuickBooks Online
Security - Enable 3rd Party Integrations
After you finalize an invoice in CCH iFirm, you have the ability to send that invoice to QuickBooks Online. An invoice can be unfinalized in CCH iFirm, then re-sent to QuickBooks Online.
- Click Time and Billing > Invoices.
- Click the Finalized Invoices tab.
- Use the filtering options, if required, to view only relevant finalized invoices.
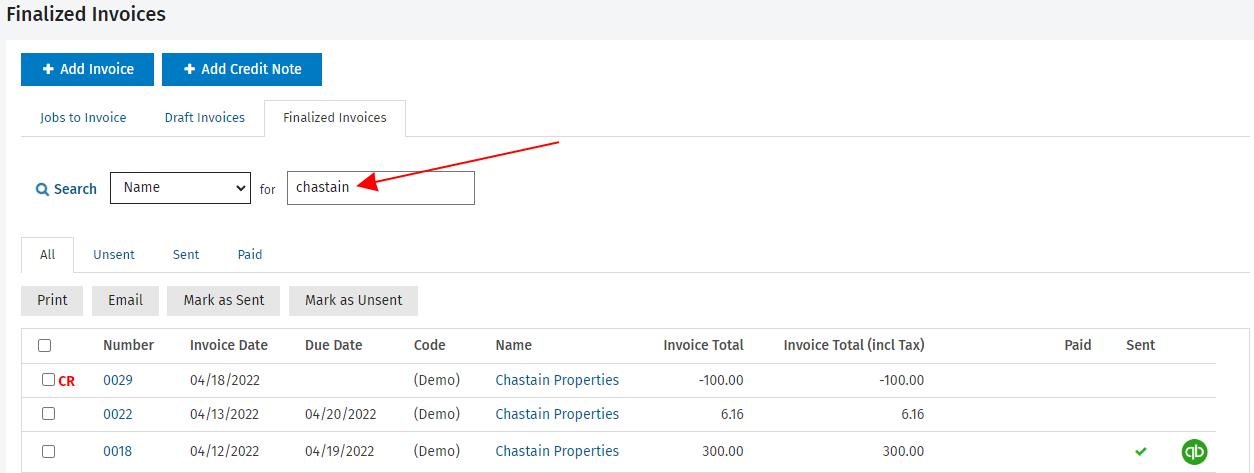
- Click on a row to open the invoice.
- Click the Send to QBO button.
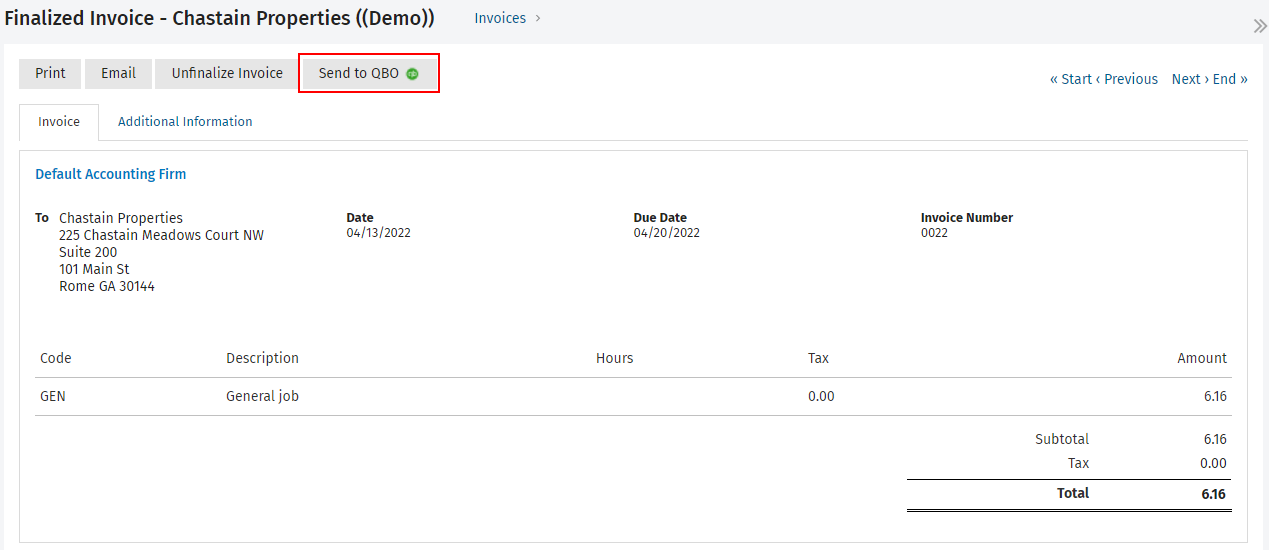
- Select the sales term applicable for this invoice from the drop down list. You must select a sales term in order to send the invoice to QuickBooks Online.
Your last selection will be saved as the default for the sales term when sending invoices to QuickBooks Online.
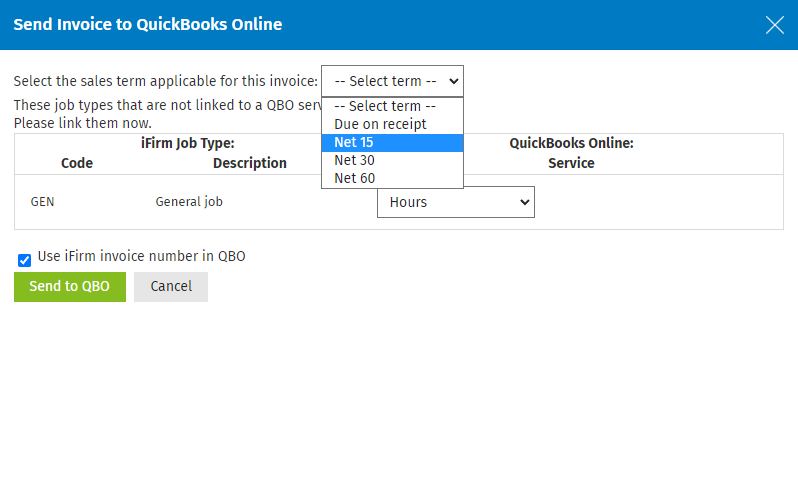
- Select a sales tax code from the drop down list, if applicable. See the items to note about sales tax.
- Select the QuickBooks Online service from the drop down list that should be linked to the CCH iFirm job type. The options in the drop down list are the services from QuickBooks Online. Once you link a CCH iFirm job type to a QuickBooks Online service, CCH iFirm will save that selection as the default for the job type when sending invoices to QuickBooks Online.
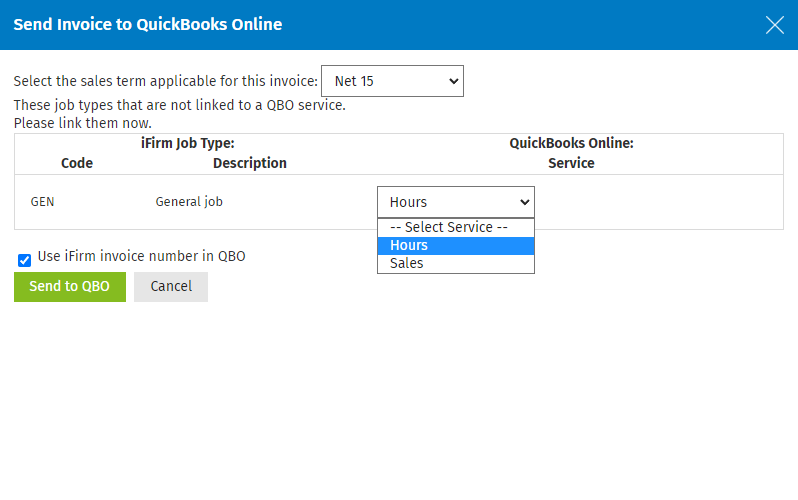
- Select the Use iFirm invoice number in QBO check box to use the invoice number assigned by CCH iFirm in QuickBooks Online.
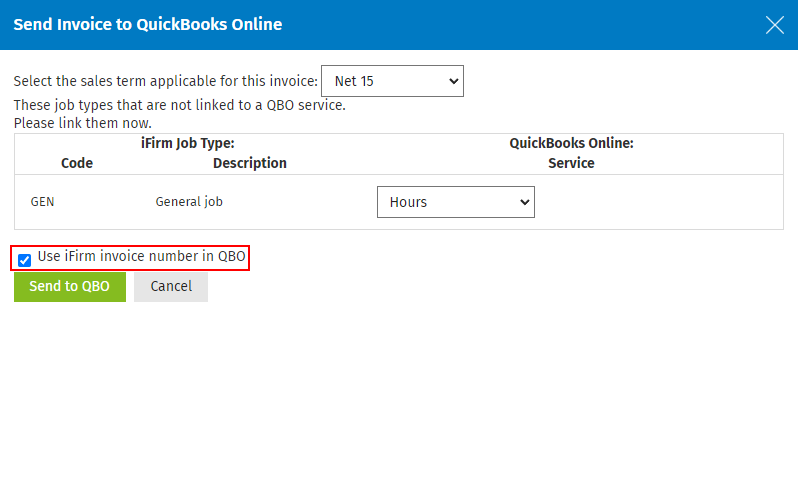
- Click Send to QBO.
- Click OK to confirm the invoice was sent to QuickBooks Online.
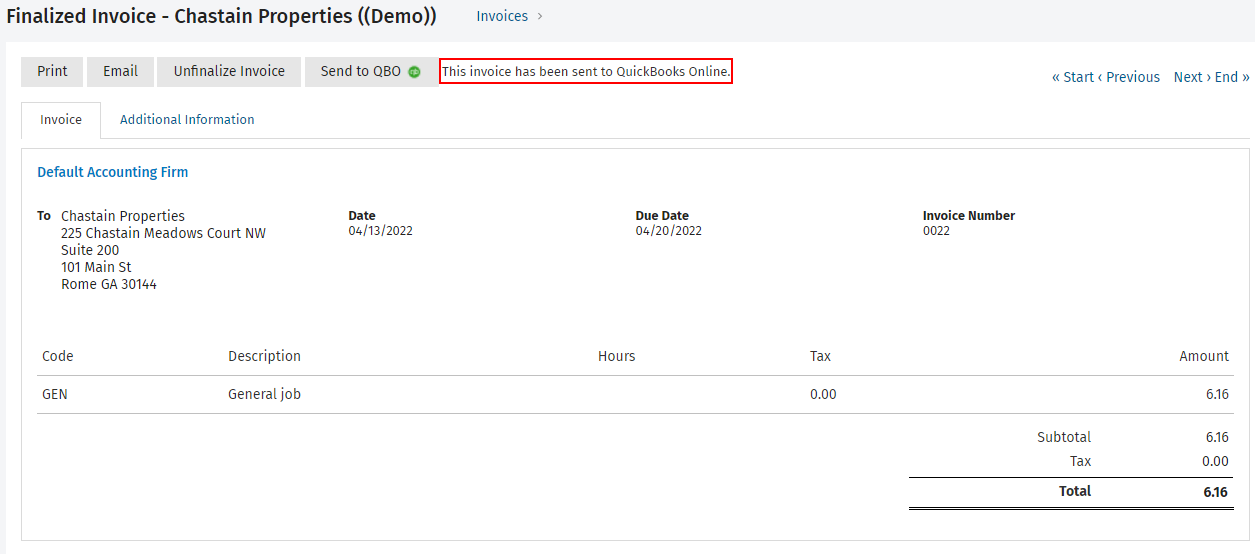
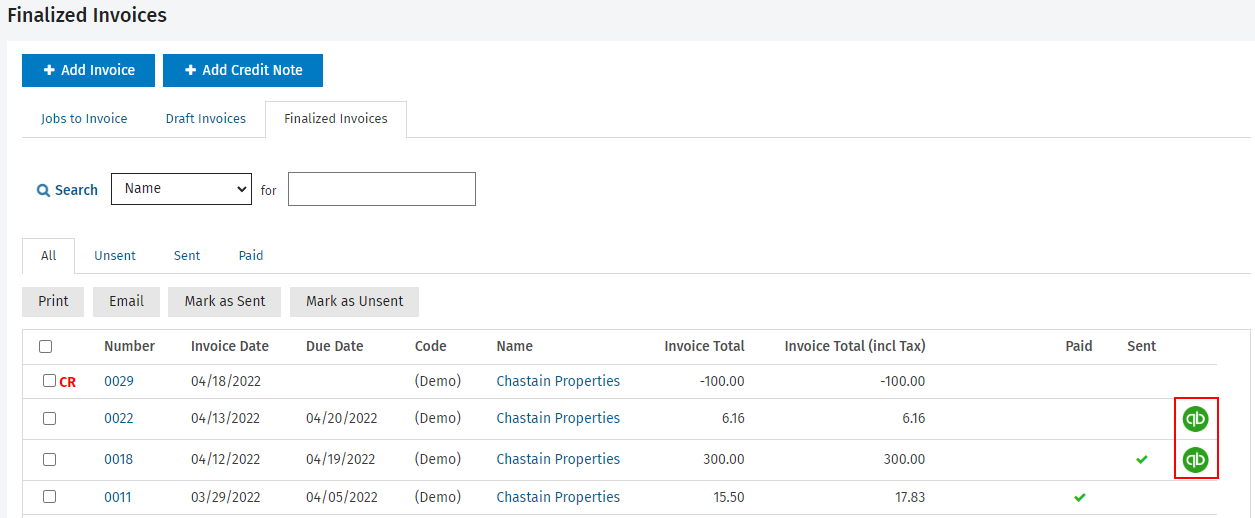
A QuickBooks Online icon ![]() will be displayed on the Finalized Invoices tab of the Invoices page indicating it was sent to QuickBooks Online.
will be displayed on the Finalized Invoices tab of the Invoices page indicating it was sent to QuickBooks Online.
Items to note about sales tax:
- If sales tax is not enabled on your QuickBooks Online site, you will be prompted to enable sales tax in QuickBooks Online in order to proceed with sending the invoice.
- For QuickBooks Online companies created before November 10, 2017, you must select the sales tax code from a drop-down list on the Send Invoice to QuickBooks Online dialog.
- For QuickBooks Online companies created after November 10, 2017, QuickBooks Online manages sales tax calculations based on the company address. This means that in CCH iFirm, you will not have to select the sales tax code on the Send Invoice to QuickBooks Online dialog.